 Zoe Connell
 667
667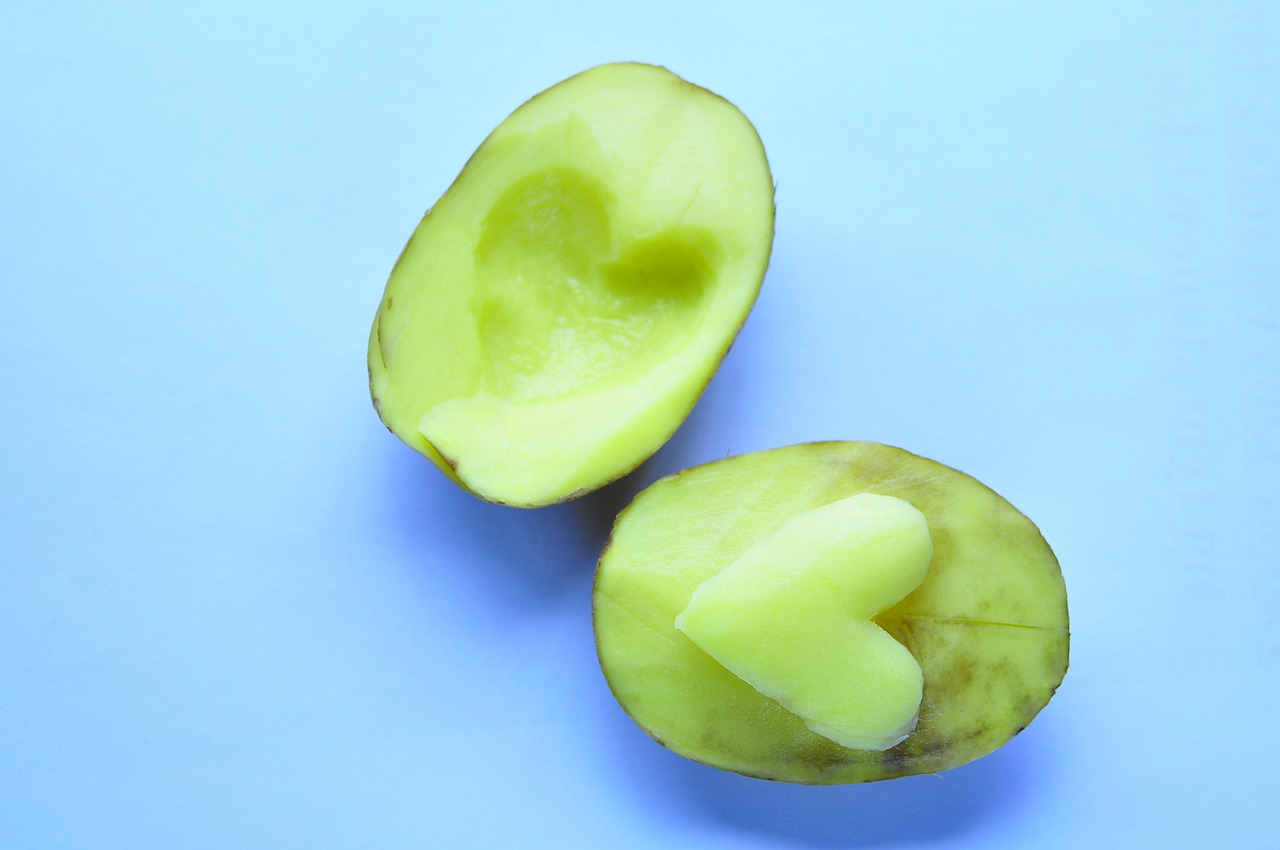
Catriona Clayson is a Print Technician, usually based in the Daphne Oram, and Artist. She’s put together some printmaking ideas for those that want to try something a little more ambitious.
Not being in the studio over the last has been a struggle of the last weeks and I’ve been focusing on new techniques and ideas for our return. Living in a teeny house in Whitstable, I have never been set up for printmaking at home. The dining room table has been taken over! Covered in lining paper. Only having 2 rollers at home and one tube of ink, I’ve been focusing on textures and immediate results from things around the house. Luckily I’m a hoarder and have a large collection of papers!
There are a few things to consider when thinking about printmaking from home. Have a decent table, a nice piece of heavy thick glass or mirror to roll out ink (a good tray can be used)… oh and an apron! You will get messy!
I’ve not bought anything new during lockdown. Made it a rule here, not to buy anything new and use up what I’ve been storing in the house for years! Perfect timing! So…… I’ve one tube of proper printing ink. Black. Printing ink has very specific qualities, the main one being it doesn’t dry and will stay tacky whilst you work. It also can then be rolled and create an even finish. This being said I’ve got a heap of acrylic paint which I have used, but the key here is to use lots and quick as it can dry very quickly. Here are a few piles of things I’ve collected for this blog.
What you need:
- Block Printing Ink (can be bought online, lots of colours, £5ish).
- Acrylic Paint.
- Roller (I’ve a nice expensive one, but you can buy red handled basic rollers online £5ish. You want a rubber one for Lino).
- Potato.
- Tooth Picks.
- Scissors.
- Cloths for cleaning and tearing for wiping.
- Anything that is flat and has a texture. Think ripped cardboard, ribbon, lace, tears of paper etc.
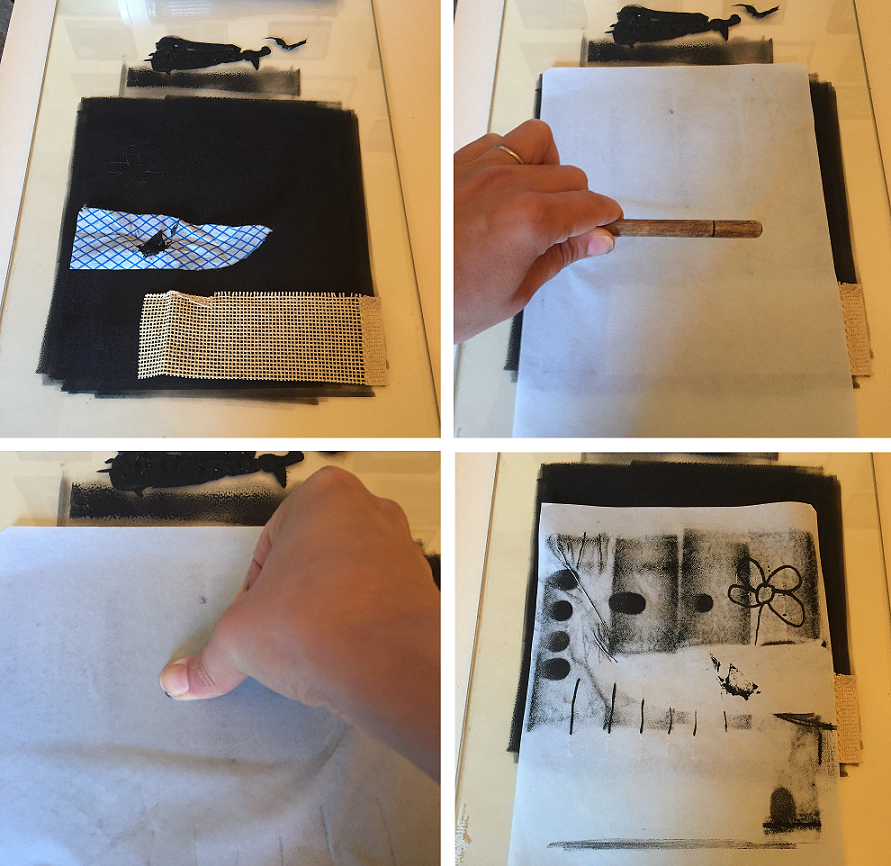
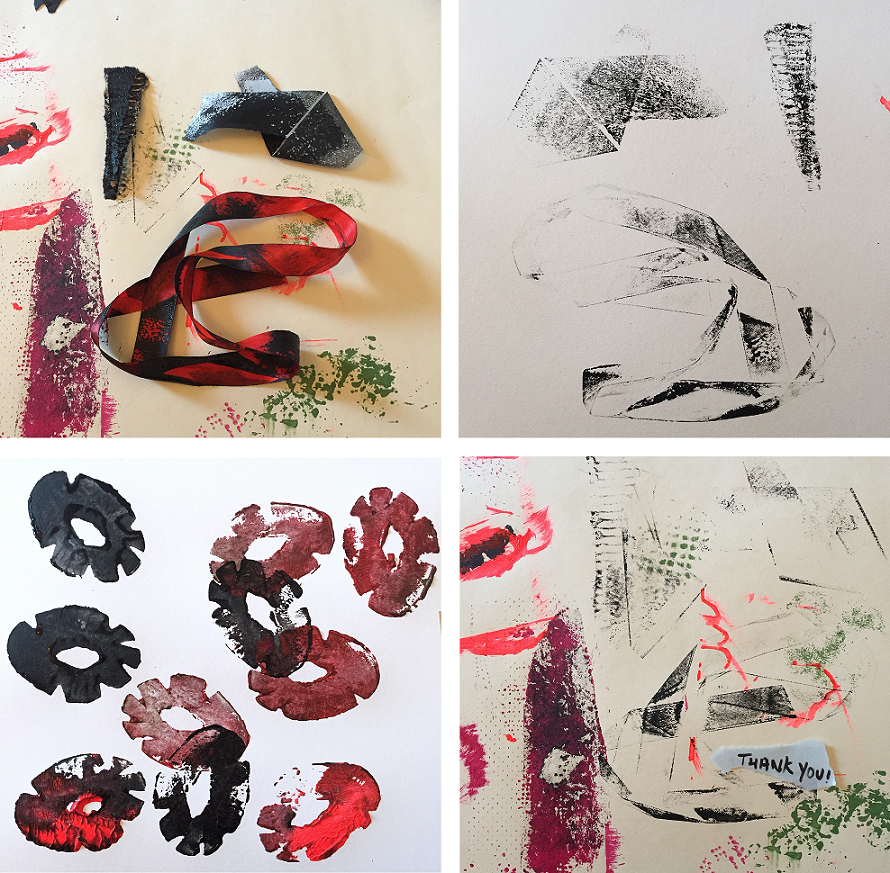
Monotype:
Monotype is the simplest form of printmaking. An immediate result. A one off!
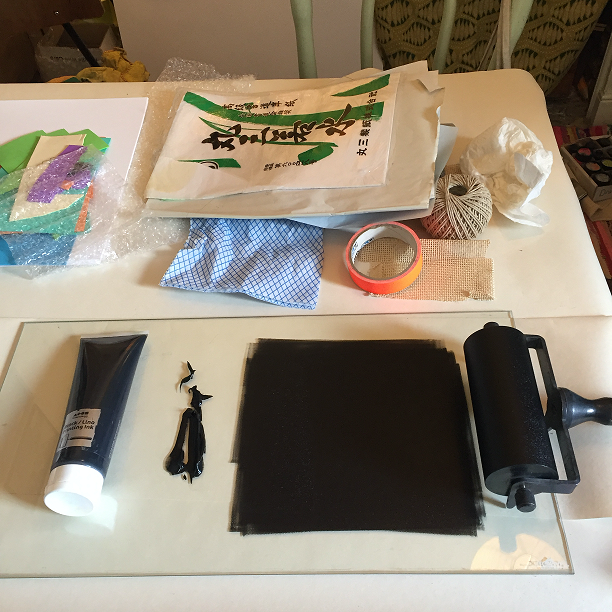
Squeeze a little ink out onto your glass, mirror, or sturdy flat tray.
Roll your roller into the ink and begin to roll out a square away from the squeezed out pile of ink. Change directions with your roller, back and forward, side to side, to create a flat even layer of ink.
You want to hear that lovely sound of tackiness.
If you can see the ink attaching the roller in strings = too thick.
If your ink pile starts to become matt = too thin.
You are ready!
- Think about your image, but hey not too much!
- I’ve a strip of torn paper here and with a tear of cloth I will draw with my finger, taking away some of the ink from the square.
- I’ve used some very fine Japanese paper here. Specially for Lino. But Tissue, fine photocopier paper, old fax paper works too! Thinner the better. Thicker paper requires more pressure.
- Press down with a roller, or back of a spoon… or your hand! Press hard and evenly!
Finished!
This took a couple of minutes. The wiped away finger drawing has created a negative white line and the torn paper has cut out a blank shape. The ink could have been a little thicker at this stage, but I quite like that you can see where the roller has been.
Another…
- Here I have used the torn cloth from previous print as a cut out.
- I’ve used the end of the spoon as my drawing tool.
- I’ve pressed my thumbs and fingers into the back of the paper and
- Rolled with even pressure for finish.
And another…
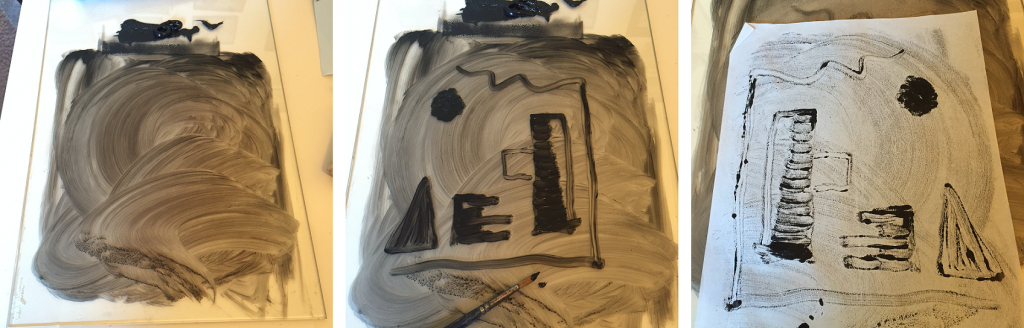
Little experiment – Half cleaned glass with painted ink. Again, with pressure I rubbed the paper in, but my painted ink was not thick enough.
One more!
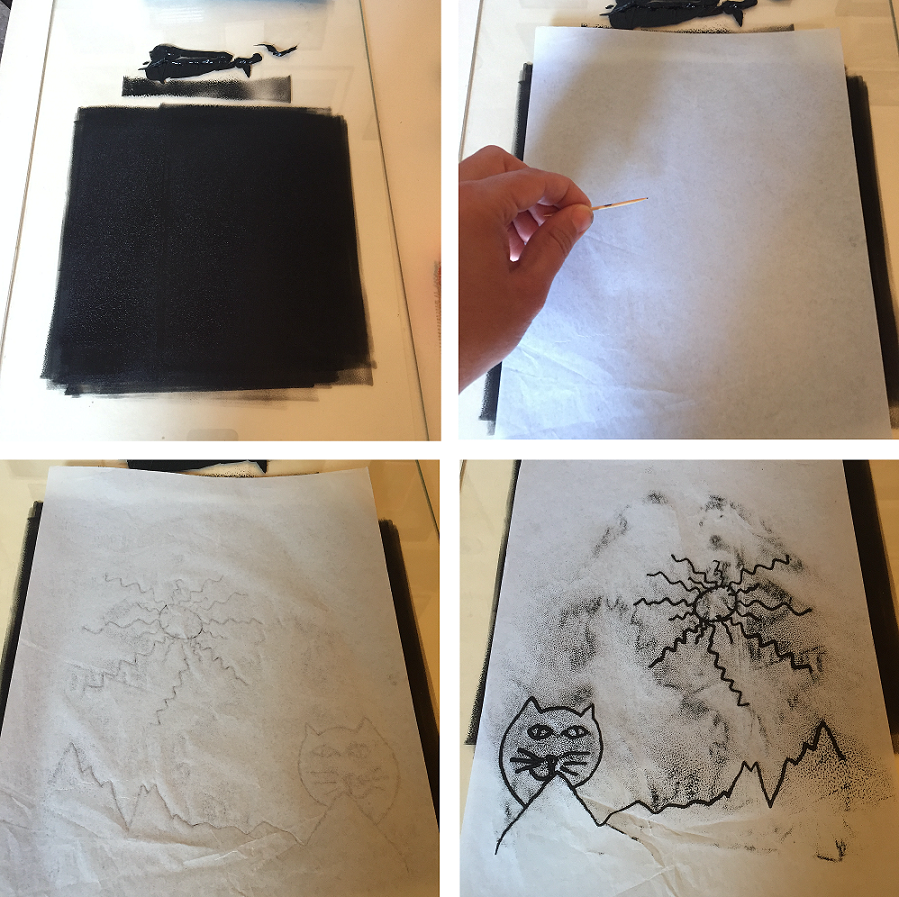
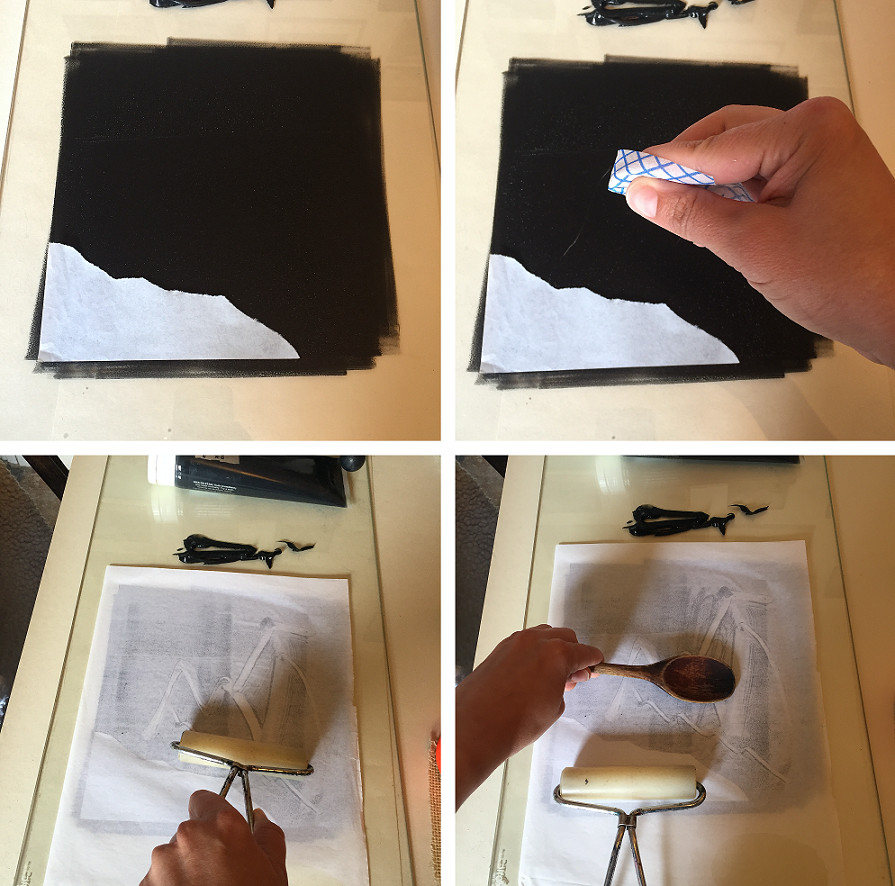
Nice easy one here:
- Roll out ink.
- Put paper down over the ink.
- DO NOT put any pressure on the paper.
- With just a toothpick for pressure draw away on the back of the paper!
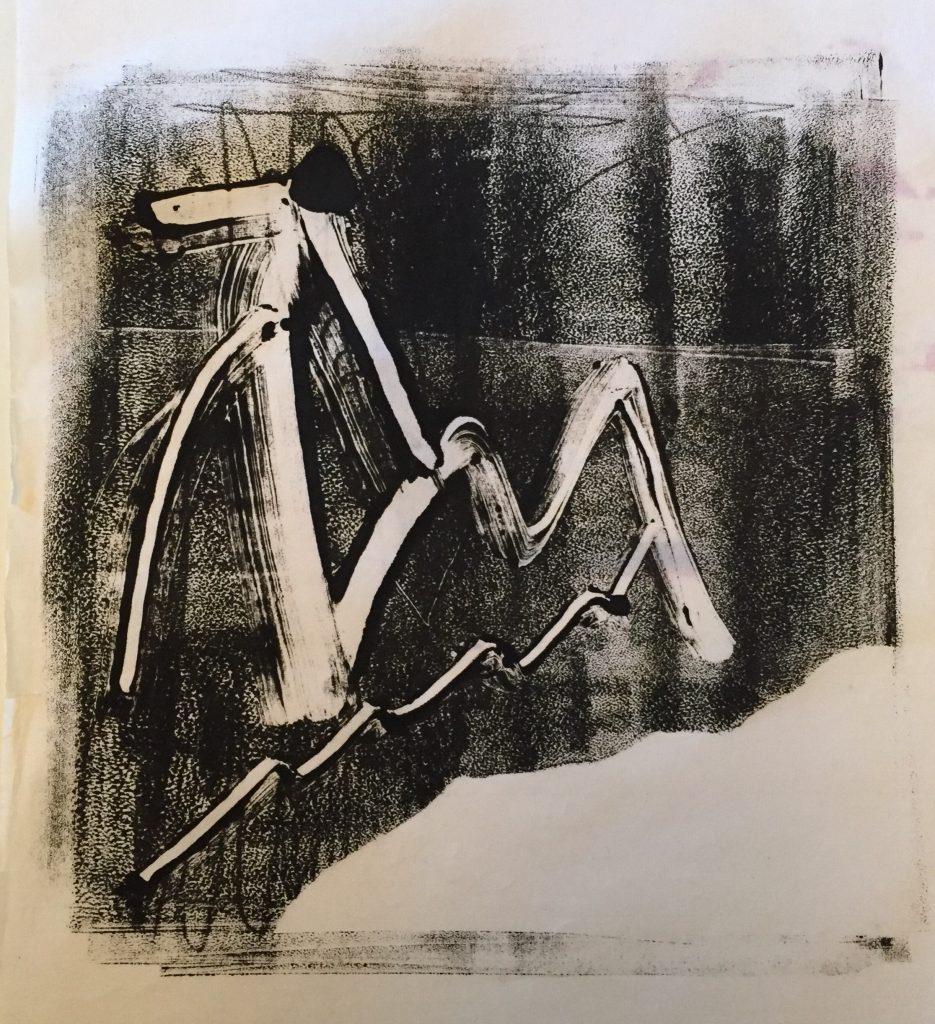
- Here is a pussy cat behind a mountain with something in the sky!!
Always remember whatever you are drawing, will be in reverse! If you are writing words, have a look at the word in a mirror.
Relief Printmaking:
Relief Printmaking can be really exciting. There have been examples of an artist making relief prints from drain lids. Another example is of an artist printing the impression of a whole piano! A relief is often a true impression of whatever you have covered in ink. Due to my lack of proper ink, I’m going in with the Acrylic. To begin, get all your bits ready. Take some time looking and feeling textures of stuff you might find around. Leaves, feathers, embossed wallpaper, tin foil, lace, woven fabrics. The finer and flatter the better for fine works. In these examples I’ve tried to combine as much as I can. Lots can be done in stages, but just remember your paint dries quickly, so be mindful of waste. Don’t squeeze out too much too soon!
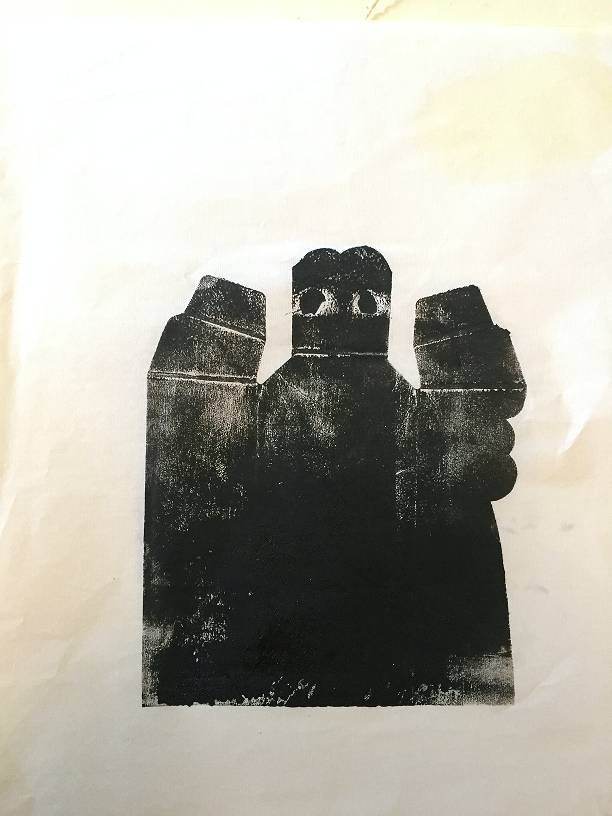
Straight in with my favourite find in lockdown!
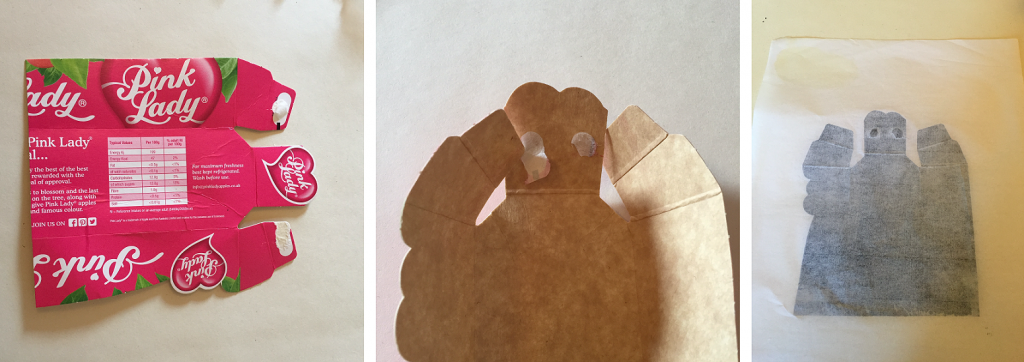
Hello!
Pink Lady Apples from Iceland. Who knew this one was lurking inside and there is a friend!
- I rolled the Block Printing ink healthily all over. Back and forward, up and down.
- Lay your paper over the shape and, with lots of pressure, rub and rub or roll and roll.
- Very quick and fun result.
- The glue from the packaging has given this being some eyes.
- Think about that glue. A wee dab and left to dry on something for the future!
Now for the potato…
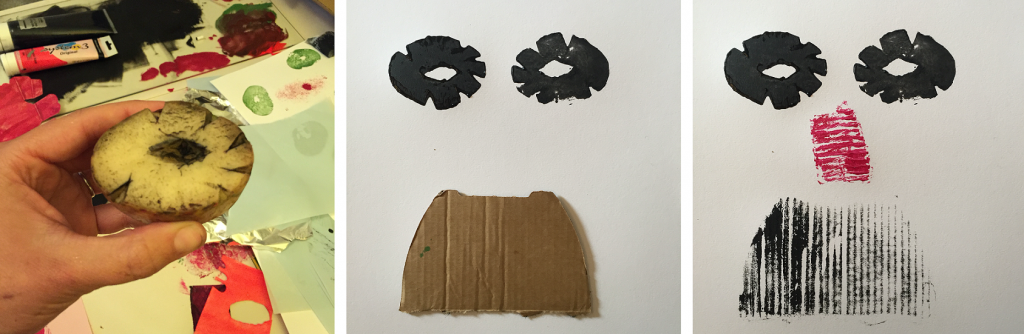
You’ll be pleased to know that I’d forgotten the take a photo of THE potato before I’d thrown it in the bin! Don’t worry it was only halfway down.
I’d carved as simply as possible for this. It can be quite fiddly. Straight in half to begin. Lovely flat edge. Cutting away from the edges is easy and this certain potato was quite moist! I cloth dried it as much as I could. I didn’t want it too dry as the flush edge could change.
The beauty of the potato or stamp- you can repeat the same shape quickly.
I still had printing ink left over, so used it up on these eyes.
Press quite hard, but resist the urge to twist to get more pressure. This sound silly, but you can lose your carved shape very easily.
Most packaging comes in already shaped pieces. I thought this looked a little like a mouth.
I simply rubbed the backs of the cardboard shapes by hand.
Simple faces with simple shapes.
Think about portraits of your families and friends.
Make that acrylic thick and thoroughly paint your shapes.
Bubble wrap and a dried out eye makeup remover pad…
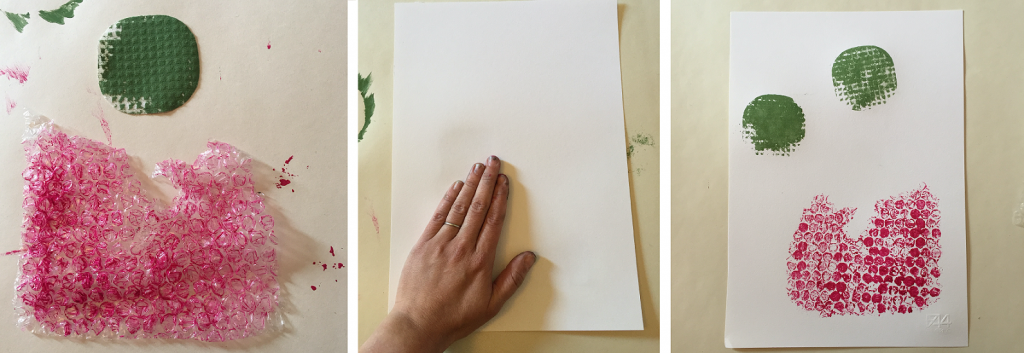
I did this one in two stages. I wanted as much texture from the bubble wrap as possible, so I put the paper over the bubbles. That way I can use more pressure.
I covered the pads a bit too much with paint, so decided to use it like a stamp.
Bit of rubbish I found by the bins…
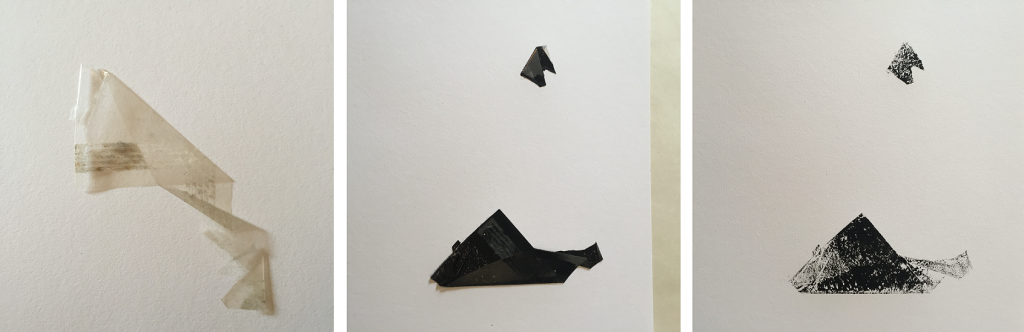
A grubby bit of rubbish. I rolled it in the ink, it broke up. I lay the pieces as flat as I could, then cover with paper and rubbed by hand. Simple effective image.
Last but not least…
A Look behind the scenes – check out the great mess you’ve made!
Don’t forget to share a photo of your artwork with us on twitter!
Catriona Clayson, Arts and Culture


