 Zoe Connell
 716
716
Today’s blog is inspired by Sustainability. Tina, our Outreach and Programme Co-ordinator for Arts and Culture, has come up with some projects that are all recycled or biodegrable, fun and easy to make. For more sustainable inspiration for lockdown and beyond, including recipes and self-care, check out the Sustainability team’s blog.
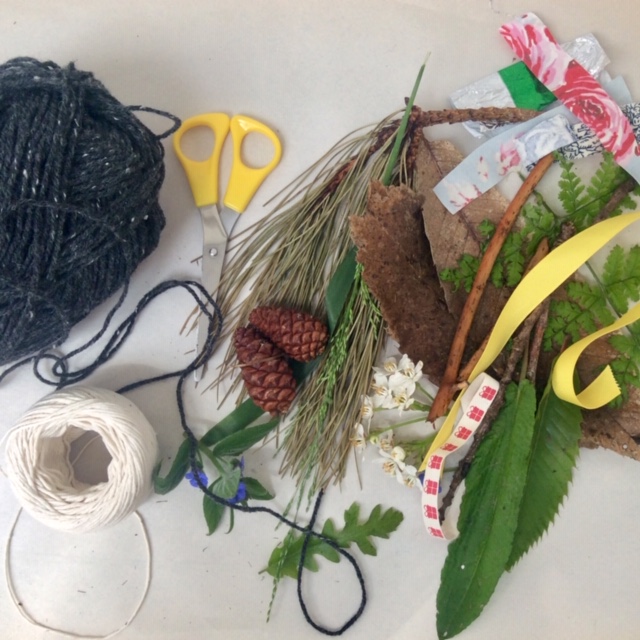
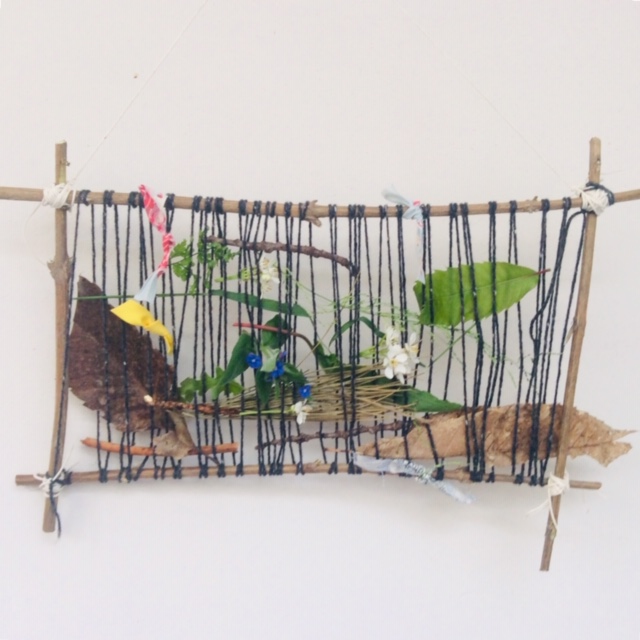
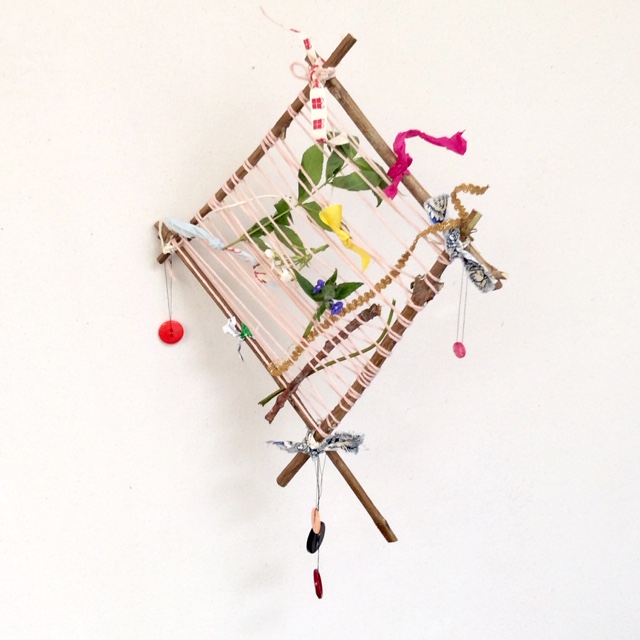
Nature Weaving
You will need:
- Sticks
- Yarn/string/wool
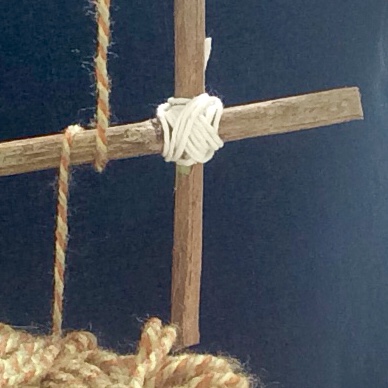
- Tie the sticks together with the string to create the frame for your loom. Criss cross around each corner, pulling the string tight and secure with a knot. You can make the loom any size or shape. It can be rectangle, square, triangle, even a hexagon.
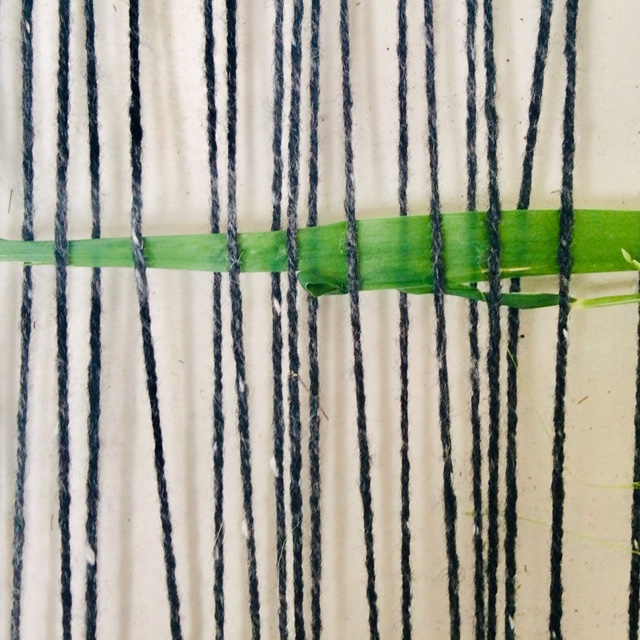
- To get the loom started tie a piece of yarn around one corner and begin wrapping round the loom, so that it runs across the frame in parallel lines. Once you have got to the end of your frame, tie off the yarn on one of the corners. Well done, you now have a loom – now you can start to decorate!
- Go on a nature walk in your back garden, park, or neighbourhood. Collect leaves, twigs, sticks to decorate you may even find a lucky feather on your nature walk.
- Weave your treasures through the loom. For added decoration recycle some old fabric pieces, colourful ribbon, odd buttons and shiny sweet wrappers.
- Once you have finished you can lean it against a window or hang as a decoration. You can reweave anytime and add new treasures.
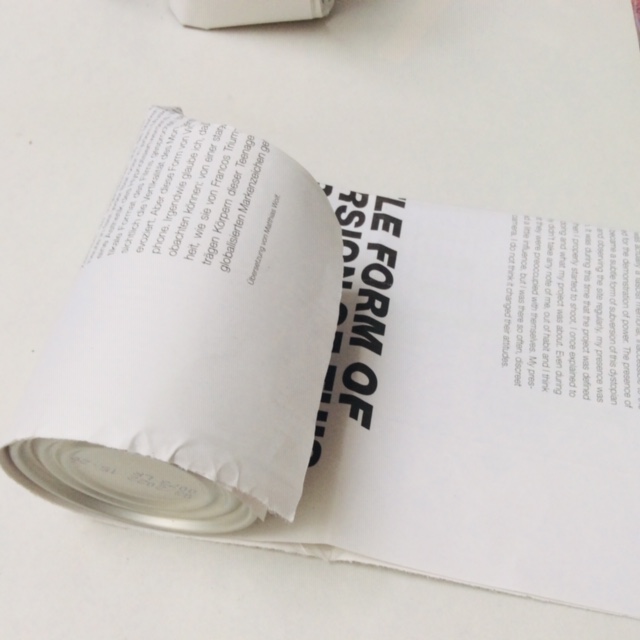
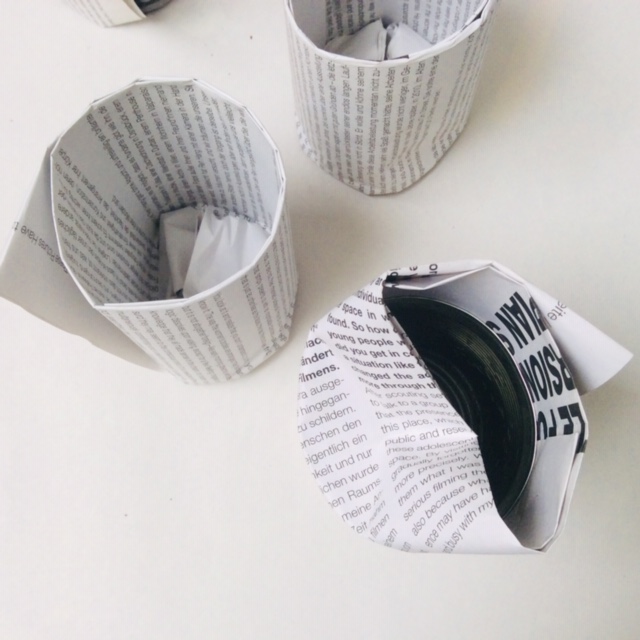
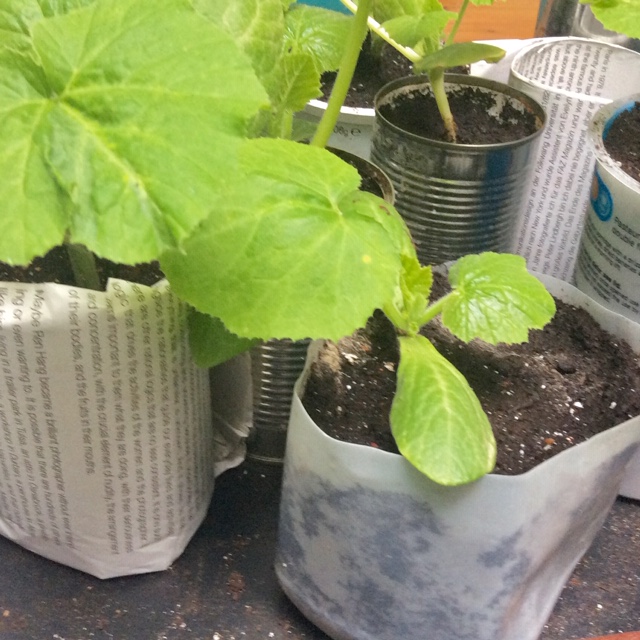
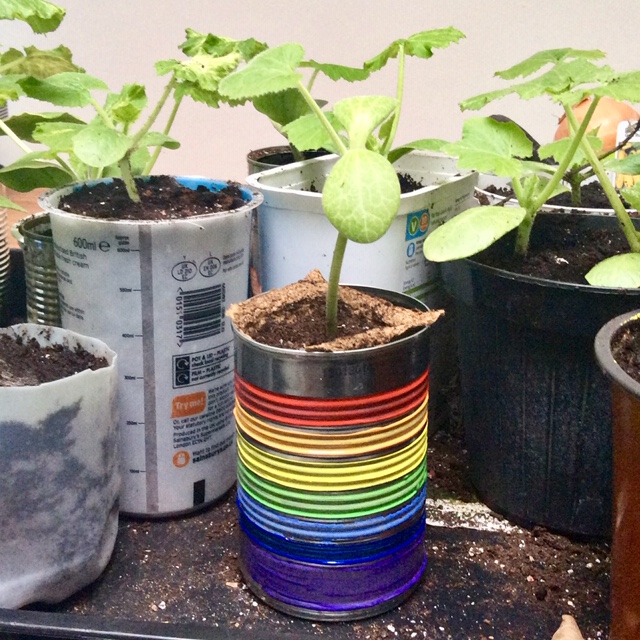
Newspaper seedling pots
You will need:
- Black and white newspaper (Shiny or coloured papers can be made with paper and ink that may not be safe for your garden)
- Cylindrical objects to act as moulds. Tina used a small glass jar.
- Lay a full sheet of black and white newspaper flat on the table.
- Fold the paper into quarters, lengthwise, to form a long, narrow strip of folded newspaper.
- Lay the jar on its side and place it on one end of the strip of paper. About half of the strip of paper should overlap the open end of the jar. Roll the newspaper tightly around the jar to create cylinders, then crumple the overhanging paper into the open end of the jar.
- Carefully pull the jar out of the newspaper pocket, then turn the jar around and push the bottom of it into the newspaper pot to flatten the folded bottom. This will seal the base of your pot so there is no gap for any compost to fall through. Once the pot has been filled with soil, the bottom will be secure.
- Pull the mould out and you have a finished paper pot. Stand pots in a seed tray, ready for sowing.
- The finished pots are quite sturdy while the seeds are growing. When the plants are ready to go outdoors, the whole pot will break down quickly once they’ve been planted into the soil.
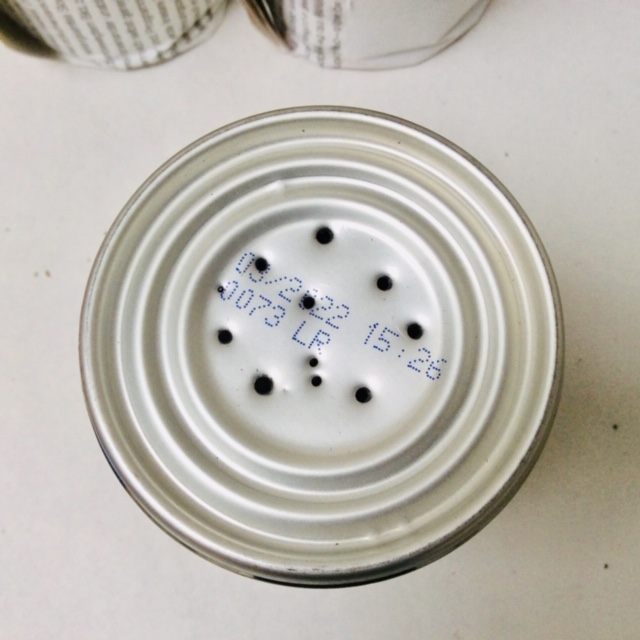
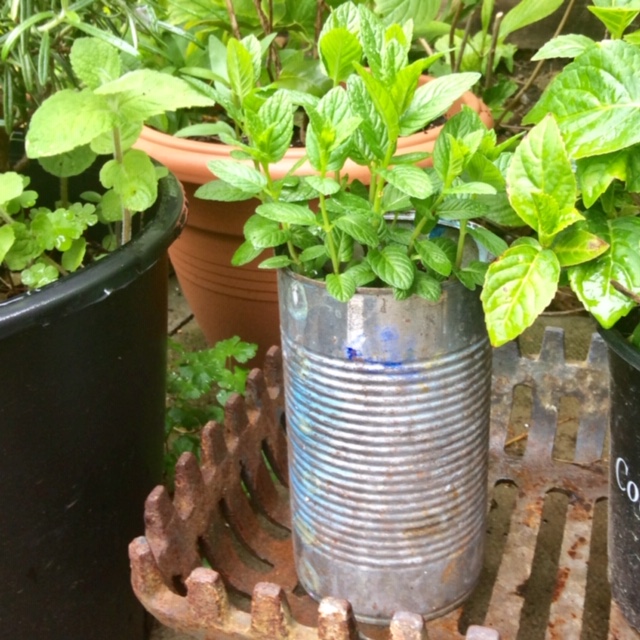
Tin Can Plants
You will need:
- Old tin cans, cleaned out. Remove the labels if you like.
- Hammer and nail
- Pea shingle, broken crockery or similar for drainage
- Using a hammer and nail, make drainage holes in the bottom of the cans.
- For drainage add a small handful of pea shingle, or you can use small bits of broken crockery, or small stones and pebbles from the garden.
- Fill the can with soil.
- You can plant seeds and watch them grow or use as plant containers for your garden/window box.
- Why not get creative and decorate the pots. They will rust over time but that adds to the charm of these little treasures…
Recycled Collage
You will need:
- Coloured card and plastic from your recycling
- Glue (if you don’t have any at home, look up the recipe from our previous blog *link*)
- Scissors
- Raid your recycling bin for supplies. Try to find a good selection of colours, and make sure everything’s clean. Card and paper will work best but you can also work with plastics, or natural materials, and whatever else you might find.
- Consider the colours you have available and see if it lends itself any particular subject matter or theme. Lots of blues or greens could work well for a seascape or landscape. A gardening magazine might provide lots of flowers with which you can make a garden.
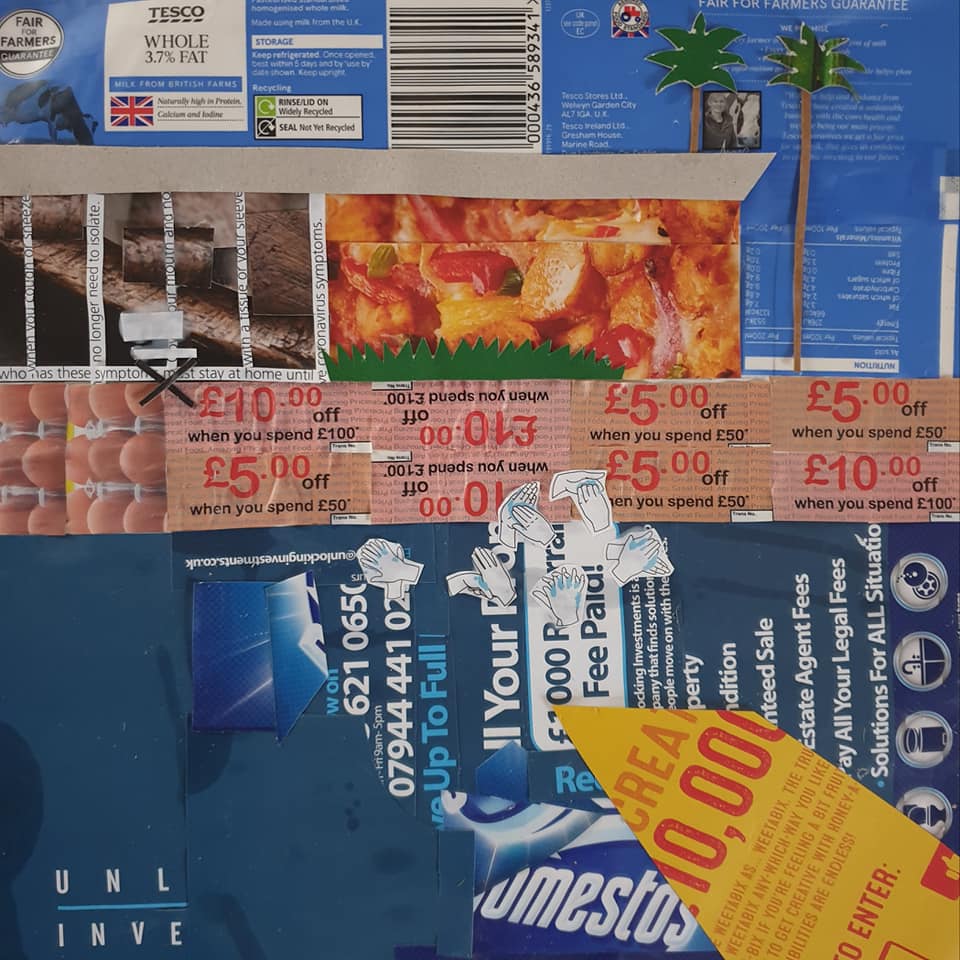
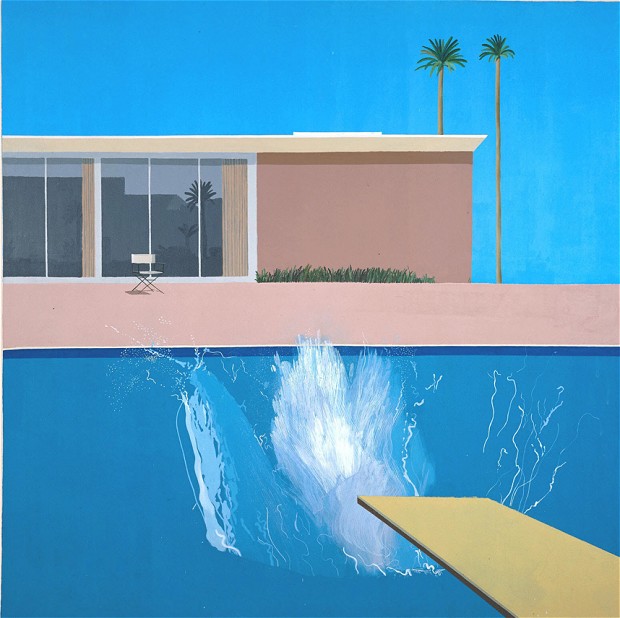
- Many people have been recreating famous artworks using objects found around their home, so Kellie decided to recreate David Hockney’s A Bigger Splash (1967), using labels from milk and bleach bottles, a pizza box, and junk mail.
- Sketch out the vague shapes of what you want to create on a piece of paper. Thicker paper will support the collage better. The sketch doesn’t have to be too detailed at this point.
- Start cutting shapes out of your materials. Some shapes can be cut out in one piece (like the yellow diving board) or you can overlap lots of pieces of similar colours to make a block (like the swimming pool).
- Leave the glue to dry thoroughly. As it dries out, some pieces may become unstuck so you will have to touch it up with a little more glue.
- Share a photo of your artwork with us!
Kellie Hogben, Arts and Culture


